
The Fractured Archive is Old School RuneScape’s fourth raid, designed to be fought by groups of 2-8 players.
Requirements
- Completion of While Guthix Sleeps for access to the Archive.
Suggested Skills
 99+
- 99+
- 99+
- 99+
- 99+
- 99+


Transportation
The Fractured Archive is located in the Chasm of Tears. It can be reached by:
- Archivist’s folio teleport
- Guthixian temple teleport
- Games necklace teleport to Tears of Guthix, then enter the chasm (requires sapphire lantern)
- Running from the Lumbridge Swamp Caves (requires sapphire lantern)
Equipment
The Fractured Archives contains many unique bosses with a plethora of defensive attributes that can make deciding which styles to bring into the raid difficult. Most encounters feature enemies extremely weak to crush, but many are also susceptible to ranged attacks and elemental spells. Depending on which rooms you take, bosses have varying levels of defence reduction, which can make certain loadouts more effective than others.
Most bosses encountered in the raid are susceptible to crush damage in varying amounts. Specifically, the final boss Ocellus is extremely weak to crush and has multiple mechanics in close quarters during his final encounter. Other bosses, the Archive Guardian, Ezekiel, Bork, and Xarth are also particularly vulnerable to crush.
| Slot | Item (most effective → least effective) | |||
|---|---|---|---|---|
 |
 Inquisitor’s great helm |
 Torva full helm /  Oathplate helm |
 Neitiznot faceguard /  Serpentine helm |
 Void melee helm |
 |
 Amulet of rancour /  Amulet of blood fury |
 Amulet of torture |
 Amulet of fury |
N/A |
 |
 Infernal cape |
 Fire cape |
N/A | N/A |
 |
 Inquisitor’s hauberk |
 Torva platebody /  Oathplate chest |
 Bandos chestplate /  Fighter torso /  Blood Moon chestplate |
 Elite void top |
 |
 Inquisitor’s plateskirt |
 Torva platelegs /  Oathplate legs |
 Bandos tassets /  Blood Moon tassets |
 Elite void robe |
 |
 Obligator |
 Scythe of Vitur >  Soulreaper axe /  Inquisitor’s mace |
 Emberlight /  Abyssal bludgeon /  Ursine chainmace |
 Zamorakian hasta |
 |
 Avernic defender |
 Dragon defender |
N/A | N/A |
 |
See Ranged | N/A | N/A | N/A |
 |
 Ferocious gloves |
 Barrows gloves |
 Void knight gloves |
N/A |
 |
 Avernic treads (max) |
 Primordial boots |
 Dragon boots /  Aranea boots |
N/A |
 |
 Ultor ring /  Lightbearer |
 Berserker ring (i) |
N/A | N/A |
 |
 Elder maul +  Crimson kisten |
 Dragon warhammer |
 Bandos godsword |
N/A |
Some encounters benefit from the utility of keeping your target at a distance while also being susceptible to crossbows (heavy ranged), or the twisted bow due to their high Magic levels. The Archive Guardian, Bork and Smork, and Dreadnoth the Jellied, Xarth, and the Ocellus phase 1 & 2 all benefit from bringing a ranged option.
| Slot | Item (most effective → least effective) | |||
|---|---|---|---|---|
|
 Masori mask (f) /  Masori mask |
 Eclipse Moon helm/  Void ranger helm[a] |
 Crystal helm[b] |
N/A |
|
 Necklace of rupture |
 Necklace of anguish |
N/A | N/A |
|
 Dizana’s quiver |
 Ava’s assembler |
 Ava’s accumulator |
N/A |
|
 Masori body (f) /  Masori body |
 Eclipse Moon chestplate / Elite void top[a] /  Armadyl chestplate |
 Hueycoatl hide body |
 Crystal body[b] |
|
 Masori chaps (f) /  Masori chaps |
 Eclipse Moon tassets / Elite void robe[a] /  Armadyl chainskirt |
 Hueycoatl hide chaps |
 Crystal legs[b] |
|
 Twisted bow +  Toxic blowpipe |
 Zaryte crossbow +  Scorching bow |
 Armadyl crossbow /  Dragon crossbow |
 Rune crossbow /  Bow of Faerdhinen[b] |
|
 Twisted buckler[c] |
 Dragonfire ward[c] |
 Odium ward[c] |
N/A |
|
 Seeking dragon arrow[d] /  Ruby dragon bolts (e)[c] |
 Dragon arrow[d] /  Ruby bolts (e)[c] |
 Amethyst arrow[d] |
N/A |
|
 Zaryte vambraces |
Void knight gloves[a] |
N/A | N/A |
|
Avernic treads (max) |
Aranea boots |
N/A | N/A |
|
 Venator ring / Lightbearer |
N/A | N/A | N/A |
|
 Tonalztics of Ralos / Zaryte crossbow |
Armadyl crossbow |
Toxic blowpipe |
N/A |


Inventory
|
|
|
||||||||||||||||||||||||||||||||||||||||||||||||||||||||||||||||||||||||||||||||||||
|
|
|
||||||||||||||||||||||||||||||||||||||||||||||||||||||||||||||||||||||||||||||||||||
|
|
|


| NPC | Defence Reduction | Initial defence | Lowest defence | Reduction method | |
|---|---|---|---|---|---|
| 1 | Archive Guardian | -104 | 260 | 156 | 4 Tonalztics of Ralos |
| 2 | Ezekiel | -52 | 130 | 78 | 2 Elder Maul / 1 Elder 7 + Bandos Godsword Damage |
| Bork | -120 | 300 | 180 | 2 Elder Maul / 1 Elder 15 + Bandos Godsword Damage | |
| the Smorks | -220 | 220 | 0 | 2 Elder Maul + 4 Tonalztics of Ralos | |
| 3 | Moia | -78 | 195 | 117 | 2 Tonalztics of Ralos |
| Dreadnoth | -125 | 125 | 0 | 1 Elder Maul + 3 Tonalztics of Ralos | |
| 4 | Dagon’hai Elder | – | – | – | |
| Dagon’hai Monk | – | – | – | ||
| Xarth | -68 | 170 | 102 | 2 Tonalztics of Ralos | |
| 5 | Ocellus (Phase 1) | -86 | 215 | 129 | 2 Elder Maul / 1 Elder Maul 1 + Tonalztics of Ralos |
| The Blade (Phase 2) | -250 | 250 | 0 | 2 Elder Maul + 4 Tonalztics of Ralos | |
| Ocellus (Phase 3) | -100 | 250 | 150 | 2 Elder Maul |
Layout
Players must fight five bosses during the run, of which the first and final bosses are guaranteed. For the second, third, and fourth bosses, players may choose which to fight.
After the third boss is defeated, a quartermaster will arrive at the atrium to provide supplies for the team.
Bork and Smorks, Dreadnoth the Jellied, and Xarth can be found on the east side of the Archive’s main room, while Ezekiel, Moia and the Dagon’hai trio can be found on the west side for their respective levels.
| 1st |  |
Archive Guardian | ||
|---|---|---|---|---|
| 2nd |  |
Ezekiel |  |
Bork and the Smorks |
| 3rd |  |
Moia |  |
Dreadnoth the Jellied |
| Quartermaster arrives | ||||
| 4th |  |
Dagon’hai trio |  |
Xarth |
| 5th |  |
Ocellus | ||
Archive Guardian
The first encounter, in the atrium of the raid, is the Archive Guardian.
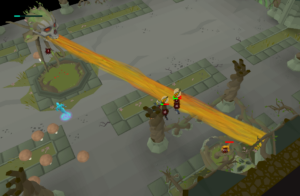
Upon starting the fight, the Archive Guardian will levitate in the air, giving it the flying status; ranged, magic and halberds can damage it in this state. Once the first bar is depleted, it will crash into the ground, where it may also be attacked with melee.
- Auto-attacks with ranged attacks, (targeting all players in front of it? other players should stand at a 90, not behind). You can step under him on the tick before he attacks so he slams the ground instead, stepping out will prevent damage (This is not consistent).
- Attacking it will lower its shield bar; when fully depleted it will lower to the ground and become attackable with melee(think verzik web phase), damaging its main health bar.
Throughout the fight, the Archive Guardian will create mushroom spores around it, dealing 3-10 damage, inflicts poison and can make players weary, lowering their attack speed and preventing them from running. Running adjacent to a mushroom, then immediately two tiles away will pop it dealing no damage.
While grounded, after an initial 6 tick delay, the Archive Guardian will target the players’ locations with a tendril every 3 ticks. Tendrils will spawn one after another and attack on the same 3 tick cycle with the attack being a 3×3 AoE swipe around it, dealing moderate melee damage and attacking 3 times before disappearing. Players who are using melee should try to run in sync to avoid colliding with the surrounding tiles. Praying Protect from Melee reduces the maximum damage to 11. Tendrils always spawn on the side of you opposite the boss. If the boss is west of you, tendrils spawn east of you. If you start far away from the boss, you only need to move 1 tile towards the boss to avoid tendrils and prevent the room from being filled with them.
- Around the room are four inert guardians, which can be charged by attacking them (some accessible by melee; others by range, earth spells weakness; last non-attackable, hit with beam). (Charging them: causes big damage to shield?) Charging does ~40% damage to shield (596 damage to 1490 health shield in 6-scale).
-
The Archive Guardian fires a beam at adventures, destroying the inert guardian behind them.After reaching 30% health, the Guardian immediately begins flying and switches to alternating between Mushrooms and magic-based “laser” attack. It will no longer possess a shield and remain in this state for the remainder of the encounter.
- The laser is indicated by the message It targets random player and deals fatal damage if there are more than 2 players alive and it is not reduced.
- Its damage can be reduced by players standing on the same line as the target player.
- Alternatively, the laser can be tick-eaten.
- Magic prayer reduces damage slightly.
- Inert Guardians can also be hit by the beam, dealing damage to his shield in this phase. However, once the boss is in kill range they stop dealing damage to the boss.
- The laser is indicated by the message It targets random player and deals fatal damage if there are more than 2 players alive and it is not reduced.
- Weak to Heavy Ranged, 80% fire weakness, 20 Crush Defence
- Vengeance does apply from melee hits from stepunders, the ranged rocks, tentacles and the laser. As a strat: the laser can be solo tanked at high HP with a tickeat and protect from magic disabled for maximum value. Vengeance Other can also be considered and whether to use it on the shield vs the boss’s actual HP. Phoenix Necklaces could be worn here during the tickeat using same logic as tickeat from Sotetseg’s Death Ball attack to heal without the use of brews/hard food.
| Slot | Item (most effective → least effective) | |||
|---|---|---|---|---|
|
Twisted bow |
Zaryte crossbow / Toxic blowpipe[a] |
Armadyl crossbow > Dragon crossbow |
Rune crossbow / Bow of Faerdhinen |
| Slot | Item (most effective → least effective) | |||
|---|---|---|---|---|
|
Scythe of Vitur / Inquisitor’s mace |
Twisted bow / Soulreaper axe[b] / Toxic blowpipe[a] |
Abyssal bludgeon |
Ursine chainmace / Zamorakian hasta |
Ezekiel
Tank and positioning
- The first player to enter the room is marked as the tank until they die. Protect from Melee reduces damage taken for the tank, but every other player will still take significant melee damage.
- Ezekiel’s melee attacks cleave almost entirely around him, leaving a safespot directly behind him, opposite to the tank. Teammates should attempt to stay opposite of the tank to take advantage of this.
- They may also step away from the boss as it is about to cleave.
- If Ezekiel cannot melee the tank, he will cast a lightning attack that hits every player.
Perfect dodges
Ezekiel’s Flying Swords and Lightning strikes can be perfectly dodged similar to Drakan’s attacks in The Blood Moon Rises – stand in the way of the attack, then move out of the way on the same tick as the attack. If you do this right, your character will dodge roll out of the attack. Against Ezekiel, perfectly dodging his attacks gives you 3% special attack energy each time, so there is some risk-reward for some extra special attacks if you can consistently execute this.
Flying Swords
- After every two melee attacks, Ezekiel will perform a large cross-shaped AoE lightning attack centered on him (similar to Ba-ba’s shockwave), which will burst twice before disappearing.
- After starting the lightning attack, he will spawn three to four swords
- These can be perfectly dodged
- The swords slowly charge a red bar, then fly in a straight line once full. They will charge at different rates if their trajectories would completely cover the arena.
- Hitting the swords charges a yellow bar which increases their damage. They are resistant to ranged and very weak to air magic. Note that empowering the swords increases the damage they deal to both Ezekiel as well as to the player.
- If Ezekiel’s is completely hit by a sword (ie, lined up with the exact path of a sword), he will take damage and be stunned for a few seconds. Otherwise, he will heal for a significant amount of HP. A successful block should result in him yelling “Argh!”
- Tip: Stand in the path of a sword if it keeps Ezekiel positioned for a stun, and dodge out of the way once it flies out.
Enrage
Upon reaching 33.3% of his health, Ezekiel will reposition himself to the central eastern section of the arena, dropping a large amount of swords that will force the player(s) into the remaining space. He will then imbue himself with magic and summon three more swords, one each to his left, right and front.
It is highly recommended to bring powerful high cost spec weapons for this phase because of the special attack regen. The three dodges for the lightning pattern restore 9% special attack total and in combination with lightbearer special attacks can be repatedly used during this phase.
Ideal spec weapons include:
– Crimson Kisten
– Voidwaker
– Dragon Claws
– Burning claws
– Abyssal bludgeon (for lazy special attacks that still increase damage)
- Three shapes appear in a V under Ezekiel, and two of them are hit by lightning to show where to dodge.
- This repeats three times in a row.
- The patterns tell you which direction to dodge inside the 3×3 grid the player is placed in.
Lightning patterns
There are three main patterns:
|
|
|
|||||||||||||||||||||||||||||||||||||||||||||||||||||||||||||||


Pay attention to the sword that isn’t struck with lightning. The back row tile aligned with that sword will always be safe. Wait 1 tick after the last sword is struck by lightning, dodge in the back row, then continue attacking.
If the player does not dodge the strikes, they will take moderate damage.
| Slot | Item (most effective → least effective) | |||
|---|---|---|---|---|
|
Scythe of Vitur |
Soulreaper axe > Inquisitor’s mace |
Abyssal bludgeon |
Ursine chainmace / Zamorakian hasta |
Bork and the Smorks
Bork and the Smorks are a duo boss fight similar to that of the Royal Titans, consisting of two different entities.
Bork attacks with AoE-based melee, launching shockwaves around him. Additionally, he has 8 flat armour and 2 Magic resistance, meaning that all melee and ranged attacks are reduced by 8 and magic attacks by 2. Every 25% damage to the Smorks increases Bork’s flat armour by 2, up to a maximum of 14 flat armour.
Bork will target the first player who enters the arena, chasing after them. If his target is not within melee range he will generate a stronger beat on his first attack, which covers a larger area. The second attack will only affect the tiles immediately around him. Bork will periodically change aggression, indicated with him yelling
The Smorks attack with both ranged and magic; ranged attacks are indicated with bones and magic attacks as a cluster of potions. These are launched on all players that are not focused by Bork. Alongside these attacks, the Smorks will launch incendiary and heavy cannonballs. The Smorks are static, in the centre of the arena and block Bork’s beats.
Incendiary cannonballs will deal heavy damage if caught in its AoE and leave behind splatters of oil, which if stepped on will deal 6-7 damage per tick and ignite the player, inflicting a burn that starts at 2 damage. If Bork is hit by one he will take moderate damage.
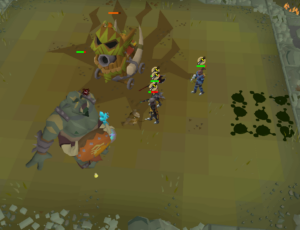
Bork is stunned after the Smorks launch a heavy cannonball at him.
Heavy cannonballs will be indicated with the Smorks yelling for Bork to avoid it. If the cannonball lands on Bork, he will become dazed, temporarily removing his damage reduction and all melee attacks on him are dealt as successful hits for a short time. The Bork tank should stand close enough to the rest of team to lure him into these cannonballs. After recovering, or if the cannonball did not hit him, Bork will stomp several times, indicated by (if hit), or (if not hit) covering the entire arena. These can be avoided by hiding behind the Smorks’ cart.
As their health lowers, Bork will begin to beat his drum faster, subsequently causing both enemies’ attack speed to increase.
When one of the pair is killed, the other will become enraged and initiate the second half of the fight.
- If Bork is killed first, the Smorks’ attack speed will significantly increase and their attacks will hit everyone in the arena. The damage from their auto-attacks are increased.
- If the Smorks are killed first, Bork’s stomps will cover the entire arena.
It is highly recommended to kill Bork first, since the Smorks’ attacks are easier to handle.
| Slot | Item (most effective → least effective) | |||
|---|---|---|---|---|
|
Soulreaper axe / Scythe of Vitur[a] |
Inquisitor’s mace / Zaryte crossbow |
Armadyl crossbow > Dragon crossbow |
Rune crossbow |
| Slot | Item (most effective → least effective) | ||||
|---|---|---|---|---|---|
|
Scythe of Vitur |
Toxic blowpipe /Inquisitor’s mace / Soulreaper axe |
Twisted bow |
Zaryte crossbow >Armadyl crossbow > Dragon crossbow |
Rune crossbow |
Moia
Moia begins the fight outside of her arena and primarily attacks with a fast ranged projectile. A ranged or magic weapon is required as she is too far to reach with melee or halberds.
Undead Binders
She will start the fight by summoning several undead binders that stand evenly spaced in the arena, leaving one gap for players to start in. Binders shuffle around the arena periodically, and will melee attack anyone within two tiles of them. Moia continually respawns binders; killing them will allow for more space to reposition without being attacked, and make the fight more manageable.
Magic Attack
Moia will periodically teleport to another side of her arena and launch a slow blue projectile that deals magic damage. Do not switch to protect against magic until she attacks with ranged again, and quickly switch to protect from magic once the second attack lands. The ranged projectile is much faster than the magic projectile, and will hit first despite being launched second.
Cough
Occasionally she will target a player with a smoke cloud projectile that will infect them with a cough that deals intermittent poison damage, similar to Nex. The damage from this coughing is significantly mitigated by wearing a Serpentine helm (possibly antipoison; needs confirmation). The player hit by the virus should avoid standing next to other teammates or undead binders, as this will spread the virus and can deal immense damage over time.
Enrage
Upon reaching 33% of her health, Moia will enter an enrage phase, repositioning the binders into a diamond formation around her. An additional charge attack above her health bar will begin counting down. If any binders are left alive after this attack is charged, she will deal massive damage to all of the players in the arena. If all binders are successfully defeated when the charge is up, she will spawn another set and continue charging subsequent attacks until she is defeated.
A venator bow is highly recommended to attack multiple Binders mid-shuffle, whenever they position closely in the middle of the arena, or for Moia’s enrage phase.
Dreadnoth the Jellied
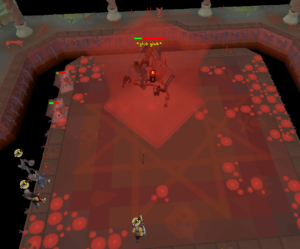
Players battle Dreadnoth the Jellied as it enters its enrage phase.
Dreadnoth moves slowly around the arena, around one tile every two ticks. He primarily attacks with melee, which will hit everyone around him, so it is recommended to range or mage him from afar. Dreadnoth is considered a demon, however he has low demonbane values. Additionally, he has 85% susceptibility to fire spells and 40% freeze resistance. The Scorching bow special attack can also be used to root him in place.
Once Dreadnoth reaches 85%, 65% and 45% of his max health he will do an arena-wide slam, followed by three ranged attacks. Ensure Protect from Melee is active for the slam, and Protect from Range is active for the projectiles. Each sequential slam will have an additional hit, up to three slams, with three ranged attacks between each. This will also spawn a lot of jellies that also attack with melee. These must be killed as soon as possible as they will drain prayer with each attack, even if blocked. Ice Barrage, Blood Barrage, or the Venator bow can be used to kill them quickly. In large groups, it is easier to stack together during this phase to ensure all jellies can be killed together.
When jellies die, and periodically through the fight, jelly will spawn on tiles. This will deal 6-8 damage per tick when stepped on.
When the boss reaches 25% health, he will announce and begin to jump towards and slam on a random player. This will do large amounts of damage and heal the boss (~30-40) if not avoided. If Protect from Melee is not active, players will take damage regardless of location. Following the slam, two projectiles; one ranged and one jelly splatter, will target the player, so it is important to keep moving. If there are any jellies still alive, if Dreadnoth jumps and slams on top of them, he absorbs them and heals as they combine.
On death, the boss will spawn around ten jellies. Once these jellies are killed, the encounter ends.
Quartermaster
The quartermaster runs the Alliance Supplies shop, selling supplies for Supply Credits earned during the raid.
- Alliance log
- Leftovers
- 6 Saradomin brew(4)
- 4 Super restore(4)
- 4 Prayer potion(4)
- 1 Prayer potion(2)
- 1 Ranging potion(2)
- 1 Super combat potion(2)
- 10 Manta rays
- 5 Halibut
- 10 Giant krill
Dagon’hai trio
The fight consists of the team fighting an Dagon’hai Elder and two Dagon’hai Monks. Upon entering the arena, the elder will order the ritual to start while he deals with the interlopers, and the two monks will quickly scatter to the sides to research the tomes scattered across several desks.
The elder and monks share the same stats and health pool, so there is no advantage in focusing one of them down.
The elder attacks with ranged and magic; the ranged attacks consist of a grey projectile, while the magic attacks are surge spells. These attacks deal damage on impact and can be prayed against with slow reactions. He will focus on one player, and attack them and those nearby. By spreading out, other players will not be hit by his attacks.
Throughout the fight, both the elder and monks will attempt to finish the ritual. The monks may either attempt to siphon knowledge from the books into the cauldron in the centre of the arena, or channel a spell. The elder will only channel spells into the cauldron. The ritual’s progression is indicated with a yellow bar underneath the cauldron’s health bar, with each successful charge increasing its bar by 25%. If this fills completely, the Dagon’hai will empower themselves and all three will attack the team. This will likely result in a wipe, as the elder will attack all players in the arena with a barrage of empowered surge spells (with each attack consisting of two surges) that deal significant damage through prayer.
- Elemental Channel: The elder or monk will yell one of the following, which is interrupted by casting the corresponding elemental spell on them. A yellow bar will appear over their shield bar, which indicates charge progression.
- : Cast a fire spell on the elder or monk attempting to channel energy.
- : Cast a water spell on the elder or monk attempting to channel energy.
- : Cast an air spell on the elder or monk attempting to channel energy.
- : Cast an earth spell on the elder or monk attempting to channel energy.
- Tome Empowerment: One of the monks will yell a corresponding quote, and air gusts will appear indicating the tiles a player needs to stand on in order to block a projectile to which would cause one of three effects around the arena. Prior to this occurring, the monk will say .
- Bandos: The monk will yell If blocked, the player will be hit by the energy, dealing up to 55 damage and causing a shockwave that spreads out on an eight tile range from them. The shockwaves will not damage the player who took the hit, however it will hit other players multiple times if they improperly run out.
- Zamorak: The monk will yell If blocked, the player will be hit by the energy, dealing ~25 damage and causing fireballs to launch in a 7×7 AoE around them, with one on the tile they were on. This also inflicts a burn starting at 3 damage. If not blocked, the cauldron will spew fireballs in a large area.
- Saradomin: The monk will yell If blocked, the player hit will be healed, causing blue and yellow shadows to appear around the arena, which summons lightning strikes after a short delay. Stepping on the yellow lightning strikes will restore health and prayer to players.
Once the health bar of the three enemies are fully depleted, the Dagon’hai will channel Zamorak’s energy to protect themselves and restore their shield gauge to full, which in turn causes the ritual’s stability to drop 20%. When this occurs, two portals will appear and drop three imps imps each into the arena. These imps attack with melee, with the damage being reduced with Protect from Melee. Players will always land successful and maximum hits on imps. Killing an imp buffs your next attack, although it is not clear how.[Explain]
After depleting the mages’ shield gauge the fifth time, the ritual will finally become unstable and the cauldron will explode, killing one of the monks instantly, while the elder and the remaining monk will be stunned. The elder will quickly recover, however the remaining enemies only have 7 hitpoints and are easily killed.
Xarth
Phase 1
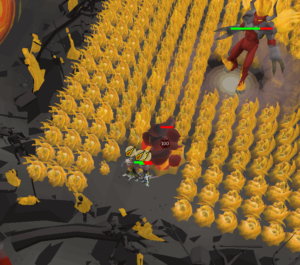
Players avoid the incoming explosion by hiding behind the pillars.
Xarth attacks exclusively with magic during this phase. His magic attacks will inflict a burn which can stack over time.
Unlike other Tormented Demons, Xarth does not have a shield to block incoming damage, however he does attack much faster. Upon reaching ~80%, ~65% and ~50% of his health, he will bind all players and launch two searing projectiles while charging up an explosive blast in the process. Once the projectile are launched, immediately hide behind the pillar to avoid damage from the blast. It is important that all members stand behind one pillar and path the same direction to it, as improper pathing and positioning can result in multiple pillars being destroyed, leaving them open to subsequent blasts.
Phase 2
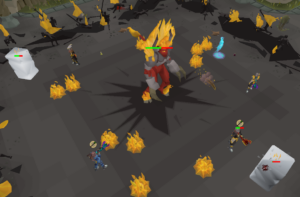
Players freeze the incoming corpses to prevent them reaching Xarth.
Upon reaching 50% of his health, Xarth will initiate the second phase of the fight. He will launch several flames into the arena, serving as hazards that will deal damage and inflict burns if stepped on. He will no longer use magic attacks, instead swapping to ranged and melee, though he remains static in the centre of the arena.
Throughout the phase, he will additionally reanimate corpses (using his magic attack animation) from the edges of the arena that will approach him, similar to the sleepwalkers at The Nightmare. If allowed to reach him, they will heal him for their remaining health. Corpses can be frozen, or they may be attacked with water spells to douse them, making them easier to kill. Ice and water spells do not have any delay when used on corpses. Avoid using fire spells, as this will cause him to summon more corpses.
If the corpses heal Xarth for 200 health, he will respond with a large AoE blast across the entire arena, dealing heavy damage and inflicting a burn on them. The damage and burn dealt is lowered if team members are standing behind the first player to take the brunt of the blast.
It seems corpses are guaranteed to be frozen at roughly +33 (give or take, not exact) magic accuracy with augury active.
As Xarth’s health lowers, corpses will begin to spawn at a greater rate, however teams with two magers should not have any issue dealing with them.
There’s a way to reset Scythe cooldown whilst attacking, not sure how yet, do not know if its due to dodging attacks or intervals.
Ocellus
Phase 1
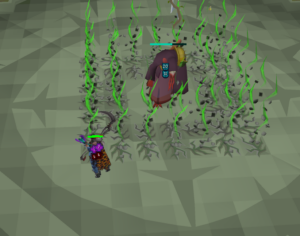
Ocellus spawns vines around him after each set of attacks in phase 1.
Ocellus will begin the fight by moving to each corner, attacking with ranged (orange) and magic (blue) projectiles. While walking to a quadrant, he will have Protect from Melee active. Once a quadrant is reached, he will summon seven tendrils, one at a time towards him. These tendrils will channel energy into him, which can be mitigated by standing on them. The player will take some damage but will be healed after stepping off the last tendril. After the seventh tendril, Ocellus will slam the area around him, covering a two tile range and dealing up to 35 damage if caught in one.
As Ocellus is considered demonic, it is possible to keep him rooted in place with scorching bow specials.
At 66% and 25% shield durability, Ocellus will teleport to the centre of the arena and spawn two tendrils in a clockwise direction, with the same two tile AoE blast after the second tendril. He will do this four times. After this attack is complete, he will charge up a powerful attack based on the energy he accumulated. If not enough tendrils were mitigated, he will announce , launching numerous projectiles that deal over 80+ damage in total, having a very high chance to kill players. If enough were mitigated, he will instead announce , launching one projectile that deals 17-18 damage.
Phase 2
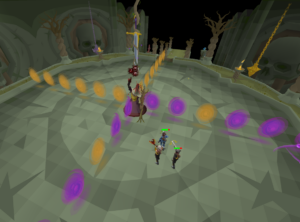
Players attack the charging sword during phase 2.
Once his shield is reduced to 0, Ocellus will teleport to the center of the arena and create 4 quadrants surrounded by orange and purple portals. Purple portals will spawn damaging attacks, while 2 orange portals will spawn on either side that intersect in a safe zone. After a few sets of attacks, purple damaging pools will spawn on the floor of the arena followed by an orange portal. This will allow players to teleport to a new quadrant and avoid the incoming barrage of attacks as the quadrant becomes unsafe.
The Blade stores all damage dealt during this phase and releases it at the end of each quadrant, effectively transferring half of all damage dealt to the boss’s phase 3 health bar.
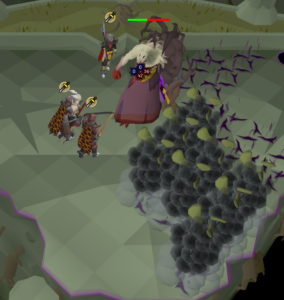
Ocellus send large shockwaves towards the players after he announces “Insolence…”, leaving a damaging area behind.
Phase 3
Ocellus will destroy parts of the arena to create 4 diagonal quadrants separated by floating rocks that can be jumped across. He will begin pursuing a player chosen as the tank attacking with melee. If he is unable to reach the targeted player, he will attack with a powerful spread void shot dealing 20+ damage to each player.
At the start of this phase, as well as the following two quadrants, void pools will spawn underneath all players except for the tank, dealing periodic damage when stepped in. By clumping up all players on a single tile in a corner of the quadrant, these void pools are placed on the same tile, making it possible to only have Ocellus spawn 3 void pools across all quadrants. This leaves the floor much less cluttered, making it easier to focus on other aspects of the fight. It is recommended to coordinate with the team which order of tiles will be chosen for this strategy.
The tank starts with 2nd orb order. Ocellus will swap tank when either the tank dies or next corner quadrant begins.
Ocellus’ attack pattern is 2 standard melee attacks followed by a directional wave attack that will travel across the arena. After 2 wave attacks, he will begin a charged blade attack, noted by a spinning purple portal opening underneath him. To protect against this attack, disable your overhead prayer and activate protect from melee prior to the attack being released.
- Ocellus will occasionally shout and root 1 player in place with a Void Vine that can only be attacked by another player. Failure to break the vine in time will deal upwards of 50 damage.
- Ocellus will spawn Void Rifts, Void Augmenters or Void Siphons in each quadrant which, when defeated, will empower the player who kills it. Failure to kill them will damage all players. Void Siphons heal the player that kills it, Void Augmenters will boost your stats, (Void rifts max hit ?).
- If Ocellus announces , he will target 3 random players in series to send wide wave attacks similar to earlier wave attacks. However these are much larger and leave a lasting damaging field where they impact.
- After a certain number of special attacks, Ocellus will and begin floating in the air and be unable to be reached by melee attacks. The entire ground will eventually erupt in a void attack, dealing 40+ damage. To avoid this, stand underneath the boss inside the purple lines. The border will glow brighter twice before the attack commences and Ocellus will slam inside this safe area, dealing a similar amount of damage. Time your escape on the final glow of the purple border to avoid both attacks simultaneously.
Once enough damage is reached, Ocellus will announce or and begin charging a blast that will destroy the quadrant. The player is killed if they do not jump via the gaps to another quadrant in time.
The four censers around the room become active during this phase. Interacting with them provides certain benefits:
- Bandosian Censer – +Melee damage – Appears to make the next melee attack max hit. Using the Zaryte crossbow special attack with ruby bolts after the censer has been used increases its max hit to 121
- Armadylean Censer – +Ranged damage – Appears to make next range attack max hit
- Zarosian Censer – Special attack – 50% spec restore
- Saradomin Censer – Healing – 50 healing and 50 prayer
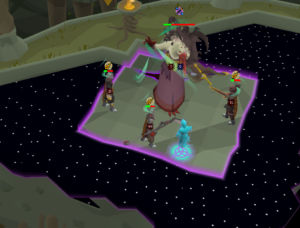
Players take their final stand against Ocellus
Phase 4
When only one quadrant remains, Ocellus will say and use a different set of attacks while utilizing the Ancient Curses prayers. The attacks will follow the cycle described below:
- Ocellus will rise into the air, turning all tiles below him and one tile away from him into void, and will begin to use the Deflect Melee prayer. Except for the start of this phase, Ocellus will additionally spawn Void Rifts that must be destroyed before they charge up to prevent potential damage.[confirmation needed]
- Ocellus will perform an attack to all players (appears as a blue, wind-like attack above the player), dealing half of each player’s current health as damage, rounded down. A light blue orb will spawn on a safe tile in the quadrant, and walking into the orb will heal the player for the damage that was dealt.
- Soon after the damage from step 2 is dealt, void particles will spin around every player, indicating that Ocellus will begin a void explosion attack. Every two ticks, a void explosion will begin at each player’s current tile and deal damage on the next tick, requiring players to constantly move to avoid damage. While the explosions are occurring the boss takes 50% less damage. If the player dodges the void explosion tick perfect within a 1 tile radius their next attack will have increased attack speed. This repeats six times. Explosions for any given player will not appear for or harm other players.[confirmation needed]
- There is a misconception that every weapon turns into a 2-tick weapon during this mechanic. Elder maul doesn’t, although it can attack at least every 4 ticks (could be every 3 ticks, but haven’t tested it) during the mechanic
- maybe weapon attack speed is halved and rounded down? Or reduced by a flat 3 ticks? Needs more testing with different attack speed weapons
- Ocellus will land on the ground, removing the floor of void around him.
- Ocellus will switch to using the Soul Split prayer. He will then perform a void blast that hits the entire quadrant, using either melee (saw blade under him), ranged (void arrows) or magic (purple energy pulsating outwards). If the attack is not prayed against, it will deal 40+ damage; if prayed, it will deal ~6-7 damage.
- Ocellus will then turn the floor of the entire quadrant into void except for the tiles directly below him and within 1 tile of him, and will begin to use the Deflect Range prayer.
- Ocellus will repeat the blue, wind-like attack and void explosion attack as described in step 2 and step 3.
- The void floor will be removed, and Ocellus will repeat the sequence described in step 5. Once the attack is complete, the entire cycle repeats. This continues until Occellus is defeated.
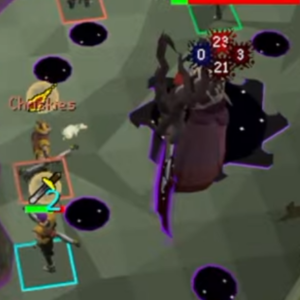
P4 Melee attack
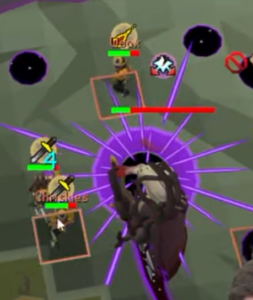
P4 Mage attack
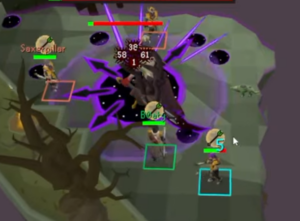
P4 Ranged attack
